
Bathroom remodeling can make the space more comfortable, safer, and visually more spacious, even in a small space. A successful solution takes into account family habits, usage patterns, and utility features to ensure a practical and durable result.
To prevent a renovation from turning into a series of remodels, it’s important to consider zoning, storage, lighting, and ventilation in advance, as well as assess any restrictions on moving plumbing fixtures. Below are ideas and recommendations to help you create a clear work plan and choose the best solutions in bathroom renovation charlotte nc.
Remodeling Ideas: Options for Different Sizes
The choice of solution depends on the space and what’s most important to you: more storage, a spacious shower, a double sink, or space for a washing machine. Even a small rearrangement can sometimes be more effective than completely relocating pipes.
Small Bathroom: Maximum Benefit in a Minimal Space
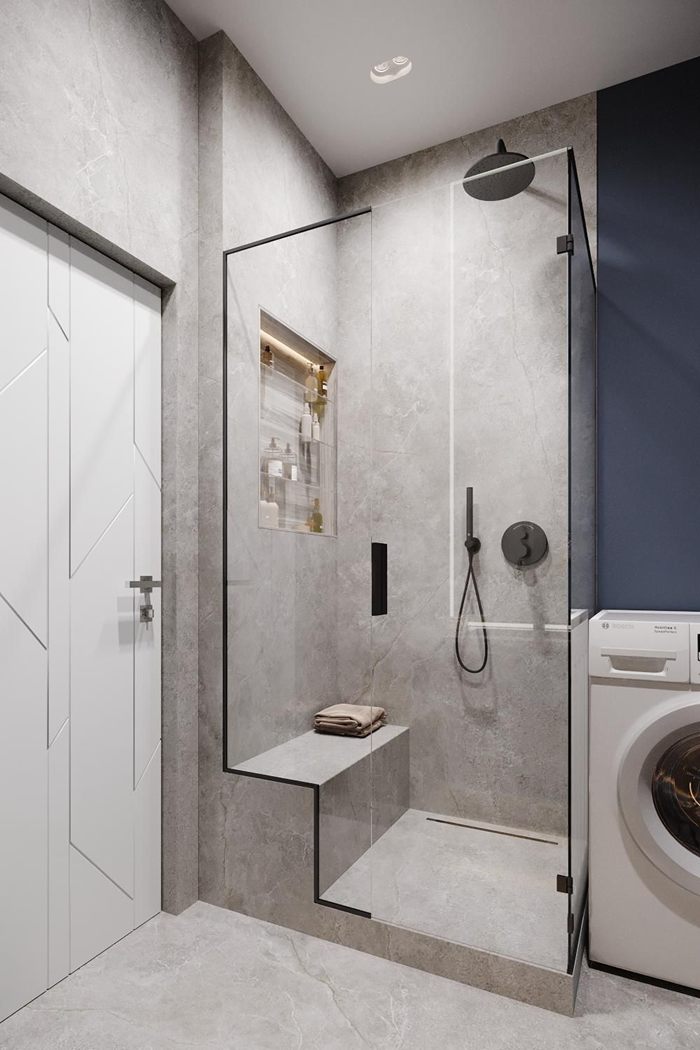
In compact bathrooms, solutions that “lighten” the interior and free up floor space work well. Wall-hung plumbing fixtures simplify cleaning and make the room appear larger. A shower enclosure with a glass partition usually looks lighter than a curtain and a high shower tray.
- Replace the bathtub with a walk-in shower with a linear drain (if the floor structure allows).
- Choose a wall-hung toilet with a toilet installation and a shelf above it.
- Place a narrow vanity or countertop sink above the washing machine (provided it’s the right height and moisture-proof).
Medium-Size Bathroom: Balancing Comfort and Storage
If you have more space, consider creating a separate storage unit: a tall cabinet, a cabinet above the toilet installation, or closed compartments for household chemicals. A good technique is to combine the countertop and washbasin area into a single line by adding a built-in laundry basket.
Combined Bathroom: How to Make It Convenient
In a combined bathroom, it’s important to consider privacy and hygiene. Small partitions, proper lighting, and clever tiling can help. If possible, it’s best to position the toilet so it’s less visible from the entrance.
Practical Tips for Finishing, Lighting, and Safety
- Ventilation: Ensure adequate ventilation, especially in a windowless shower; Add a fan with a timer if necessary.
- Lighting: Combine ambient lighting and mirror lighting to avoid harsh shadows on your face.
- Moisture Protection: Waterproof the floor and wet areas, use moisture-resistant grout and sealants.
- Safety: Choose non-slip surfaces (or matte tiles), consider handrails if there are children or elderly people in the family.
Bottom Line: A successful bathroom remodel involves not only rearranging the plumbing, but also a well-thought-out storage, lighting, and ventilation system. The more accurately you define your priorities and constraints at the outset, the easier it will be to achieve a comfortable space without unnecessary costs and compromises.
How to Estimate a Bathroom’s Area and Choose a Remodeling Scenario
Estimating a bathroom’s area begins not with the “square meters listed,” but with understanding the usable space: where you can actually stand, open doors, service plumbing, and store things. Even with the same area, two bathrooms can differ in usability due to their shape, the placement of risers, doorways, and ventilation ducts.
The correct remodeling scenario is chosen after taking measurements and checking constraints: what can be moved, what cannot be touched, where wet areas are allowed, and how feasible combining/separating is. The more accurate the initial data, the easier it is to select a layout without bottlenecks and alterations.
Algorithm: From Measurements to Solution Selection
1) Take actual dimensions (preferably on-site, rather than from a BTI plan): length/width, height, connection of risers, boxes, protrusions, niches, window location (if any), door opening direction. Separately mark areas that “eat up” space: ventilation boxes, risers, shafts, wall protrusions.
2) Calculate the usable area: exclude from the “perceived” area areas where normal use of the room is impossible (narrow passages, dead corners behind the door, riser maintenance areas). It is useful to highlight on the plan:
- passage area – routes to the toilet/sink/shower;
- service area – access to inspection ducts, meters, filters;
- storage area – a cabinet/niche/tall case that does not conflict with opening.
3) Identify “anchors” that limit the redevelopment: sewer and water risers, ventilation, load-bearing walls, thresholds/floor levels, waterproofing options, and permissible wet zone boundaries. If relocations are planned, clarify approval requirements and technical feasibility in advance (sewer slopes, route lengths, access to inspection ducts).
4) Select a scenario based on area and priorities (shower/bath), storage, laundry area, accessibility for children/elderly):
- Minimal changes – replacing plumbing fixtures “in the same spots”, compact furniture, optimizing doors (e.g., outward opening), hidden storage systems.
- Comfort optimization – rearranging fixtures within permissible zones, shower instead of a bathtub (or vice versa), expanding at the expense of a hallway/storage room while complying with standards, organizing a laundry room (washing/drying in a column or under a countertop).
- Radical redevelopment – combining/separating a bathroom, moving an opening, rerouting utilities, creating a second bathroom (if the layout and engineering allow), integrating niches and installations.
5) Check the layout for conflicts: door/drawer opening trajectories, access to A toilet and sink without knee/elbow rests, space for a heated towel rail, ample walkway, and the ability to install and repair. It’s convenient to create a scaled layout and go through the checklist:
- nothing blocks access to inspection hatches or risers;
- wet areas are logically grouped (shorter routes mean fewer risks);
- storage is planned in advance, not left as an afterthought;
- there is space for ventilation/electrical wiring/supplies without the need for DIY.
Results: A bathroom assessment is a combination of precise measurements and an understanding of the limitations of the engineering. First, identify the usable space and “anchors,” then choose a scenario (minimal, streamlined, or radical) that fits your lifestyle and budget. Be sure to check the layout for convenience, maintenance, and compliance. This process reduces the risk of errors and helps you achieve a bathroom that will function every day, not just look good in renderings.